

Fall October Speech Therapy Activities for Young Children
October is one of my favorite months for speech therapy sessions! The crisp fall air, colorful leaves, big chunky sweaters and the excitement of Halloween make it the perfect time to introduce engaging and seasonal activities that help build speech and language skills.
Over the years, I’ve found some go-to activities that my students look forward to each autumn. Here are a few of my favorites that have helped my students work on speech and language goals while having tons of fall fun!

Fall Speech Therapy Activities That I Love 🍂
1. Pumpkin Play dough Smash Mats
I can’t get through a fall season without these! I like to use themed smash mats (such as pumpkins, apples, or leaves) with playdough. These mats are great for working on target sounds, following directions, and sentence expansion. Students can “smash” a playdough ball when they find a picture or word that matches their sound or language goal. It’s always a hit, and it’s a tactile way to reinforce skills while having fun.
2. Fall-Themed “I Spy” Activities
I love creating and using fall-themed “I Spy” sheets! These are great for working on expressive and receptive vocabulary. Students take turns describing what they see, practicing prepositions like “under the pumpkin” or “next to the witch’s hat,” and making inferences. They also help with visual scanning and attention.
3. Sensory Bins with Fall Elements
Sensory bins filled with dried leaves, acorns, mini pumpkins, and little fall-themed objects provide a hands-on way for students to explore fall vocabulary. I often hide small toys or pictures related to our books, and we “hunt” for them while practicing articulation words or using target phrases like “I found a…” or “It’s hiding under…”

Halloween-Themed Activities 🎃
Halloween is such an exciting time for students, so I love incorporating a bit of Halloween magic into speech therapy sessions. Here are a few activities that have worked wonders in my sessions:
1. Haunted House from a Box

One of my favorite activities is creating a haunted house out of an Amazon box (we all have a spare box handy!). I cut out doors and windows and then use it alongside the book Inside a House that is Haunted. As we read, students place corresponding pictures or objects in different areas of the house, working on spatial concepts like “inside the window,” “through the door,” and “up on the roof.” It’s a fun, hands-on way to reinforce spatial language while tying into a Halloween story!
2. Trick-or-Treating Scenarios
We take our haunted house activity a step further by acting out trick-or-treating scenarios! Students take turns sticking their heads inside the box and “knocking” on the door. We practice social language skills by saying, “Trick or Treat,” “Happy Halloween,” and “Thank you.” This simple but effective role-playing game helps students with greetings, requests, and polite language in a context they love.
3. Digital Halloween Activities
For no prep digital activities “Who is Knocking on My Door” is a fun activity to target answering and asking “who” questions while also working on Fall vocabulary. A way to target the following sounds: B, P, T, D, K, G, F, V, S, Z, L, R , TH, DG, CH, SH is with the Pumpkin Articulation Match game for your computer or tablet! Kids LOVE competing with this fall match activity!
4. Spiders and Monsters for Non-Halloween Themes
If Halloween isn’t your cup of tea, don’t worry! I often turn to spider and monster themes, which are just as fun. My students love making “spider eggs” by wrapping small plastic spiders in playdough and hiding them inside. Then we take turns unwrapping the “eggs” to see who can find the spider. This activity is perfect for targeting core words like “in,” “out,” “look,” and “see” as well as phrases such as, “Find it,” “Not there,” and “It’s scary.” For those working on speech sound targets, we sneak in some /sp/ blends with words like spider, spy, and spooky.
5. Monster Blobs with Playdough
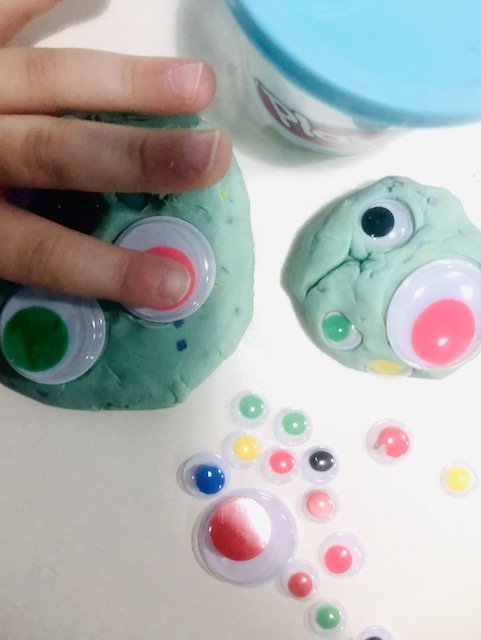
For a fun fine motor and language activity, we make “Monster Blobs” by pushing googly eyes into playdough. This activity strengthens pointing skills and can be adapted to work on speech sounds. Students practice producing correct sounds before they get to push an eye into the monster, which adds a playful and tactile twist to articulation practice.
Wrapping Up October with Fun and Learning
With the right mix of fall-themed books and interactive activities, October can be a time of both learning and fun in speech therapy sessions. My goal is always to keep students engaged and motivated, and bringing in seasonal elements helps make each session feel new and exciting.

Favorite Fall-Themed Books 🍁
The Leaf Thief: This fun and engaging story is about a squirrel who’s convinced one of his leaves has gone missing. With help from his friend Bird, they set off to solve the mystery of the missing leaf. The playful language and vibrant illustrations keep my students engaged, making it perfect for working on problem-solving, sequencing, and expressive language. I love to have my students guess who might be the leaf thief, and it always leads to fun discussions.
We’re Going on a Leaf Hunt: If you’re familiar with We’re Going on a Bear Hunt, this fall-themed version is a wonderful choice for early learners. It’s about three friends who venture through the forest, collecting leaves and encountering fun obstacles along the way. The rhyming text and repetitive patterns are perfect for targeting early language skills, and my students love chiming in with the sound effects. We often go on our own “leaf hunts” around the classroom or outside, finding different shapes and colors of leaves, which opens up opportunities to expand vocabulary and descriptive language.
Leaves, Leaves Falling from a Tree: This interactive book is such a gem because it lets students get involved in the story. I use printable leaves that students can move around during the story to “catch” or “fall” as we read. It’s ideal for following directions, matching, and describing what happens to the leaves as they fall from the tree. This story is also available as a no-prep digital version, which I sometimes use for teletherapy or for a change of pace. The interactive elements make it easy to turn the story into a game—students love pretending to catch falling leaves or finding leaves that match certain descriptions.
(affiliate links included. I earn a small amount of money from Amazon links and only recommend books and activities that I use personally)

Creative Speech Therapy Ideas: Using Stickers for Articulation, Apraxia and Language Goals
Discover creative speech and language therapy ideas using stickers! This blog post explores how to use stickers to target apraxia, enhance articulation trials, and create engaging sticker scenes. Perfect for achieving various goals in speech sessions, this low-prep, high-impact tool is a favorite among kids and therapists alike.
I want to shine a spotlight on an often underrated but inexpensive versatile resource for targeting goals in our speech therapy sessions. They are lightweight, require minimal prep, and the kids absolutely LOVE them! Yes, I’m talking about……

What is it about sticky pieces of paper that is so intriguing?
Recently, I’ve been using a Paw Patrol Puffy Sticker Book that I found at Marshalls (they also had a construction vehicle one!). It’s become a favorite among my kids, and I just had to share all the ways we can use stickers to target both speech and language goals.
Use stickers for……
Speech Sound Practice
Working with kids with Childhood Apraxia of Speech. When adding stickers to a page or background scenes model “power phrases” like “put on”, “take off” and “my turn” and use self advocacy phrases like “help me” and “it’s stuck”.
Sticker Charts: Create a chart with different articulation targets. Each time a child successfully practices a target sound, they get to place a sticker on the chart. This visual reinforcement can be very motivating (ok, so this one is overused and underwhelming, but I had to add it!)
Sticker Stories: Have the children create a story using stickers. Each sticker represents a word or sound they are working on. They can narrate their story, practicing their target sounds as they go.
Language Development
Sticker Sequences: Use stickers to create sequences or patterns. Have the child describe the sequence, focusing on using words like "first," "next," and "last."
Sticker Descriptions: Give each child a set of stickers and have them describe what they see. This can help with vocabulary building and descriptive language.
Sticker Scenes: Provide background scenes and let children create their own stories using stickers. Have them narrate their story, focusing on sentence structure and vocabulary.

STICKER SCENES
Add sticky magnets from a magnet tape roll to stickers to create magnetic stickers!
Social Skills
Sticker Conversations: Use stickers to prompt conversations. For example, place a sticker of a happy face and ask, "What makes you happy?" or use a sticker of a group of friends and discuss friendship and social scenarios.
Emotion Stickers: Use stickers depicting different emotions and discuss each one. This can help children identify and express their feelings.
Following Directions
Sticker Maps: Create a simple map or scene on paper and use stickers to give directions. For example, "Place the dog sticker next to the tree" or "Put the car sticker on the road."
Examples with Paw Patrol Puffy Sticker Book
To give you some concrete examples, here’s how I’ve been using the Paw Patrol Puffy Sticker Book in my sessions:
Prepositions: Receptive and expressive use. "Put Chase under the tree," "Where is Chickaletta?"
Expanding Utterance Length: Targeting 2+ word phrases. "Go Ryder," "Marshall wants a ride," "Bye ___." I model and repeat these phrases throughout the session.
Working with children with Apraxia: Power phrases like “put on”, “take off” and “my turn”. Self-advocacy phrases like “help me” and “it’s stuck”.
Gestalt Language Processors: Mixing and matching phrases. For example, if a child uses "Rubble on the double" and "I'm fired up," I model a combination like "Rubble is fired up."
Production of 2+ Syllable Words: We worked on "Mayor Humdinger" - a motivating 3-syllable word!
Verb Tense: Using background scenes with minis, we practiced past tense: "The car jumped over the sign," "He drove away."
Negatives: Using stickers on background scenes. "I don’t want it there," "Not in," "Not on my nose!"

PAINT STICKS WITH PACKING TAPE
Use paint sticks or tongue depressors and cover them with packing tape for repeated articulation trials.
Low Prep, Low Expense Ideas
Here are some additional low-prep, low-expense ideas to get plenty of repetitions with stickers:
Paint Sticks or Wooden Tongue Depressors: Add stickers for each target the child gets correct. I add packing tape to my paint sticks so kids can put on and take off stickers over and over for multiple trials!
Body Parts: Stick stickers on different body parts on you and the kids following each production, then have the kids take them off again while practicing their target sounds, words, or sentences.
Matching Games: Add matching stickers onto milk or juice lids, or cardboard circles or squares and play a matching game with them.
Stickers are a fantastic tool for making speech therapy sessions fun and engaging. I hope you find these ideas as helpful and enjoyable as I do. Happy sticking!
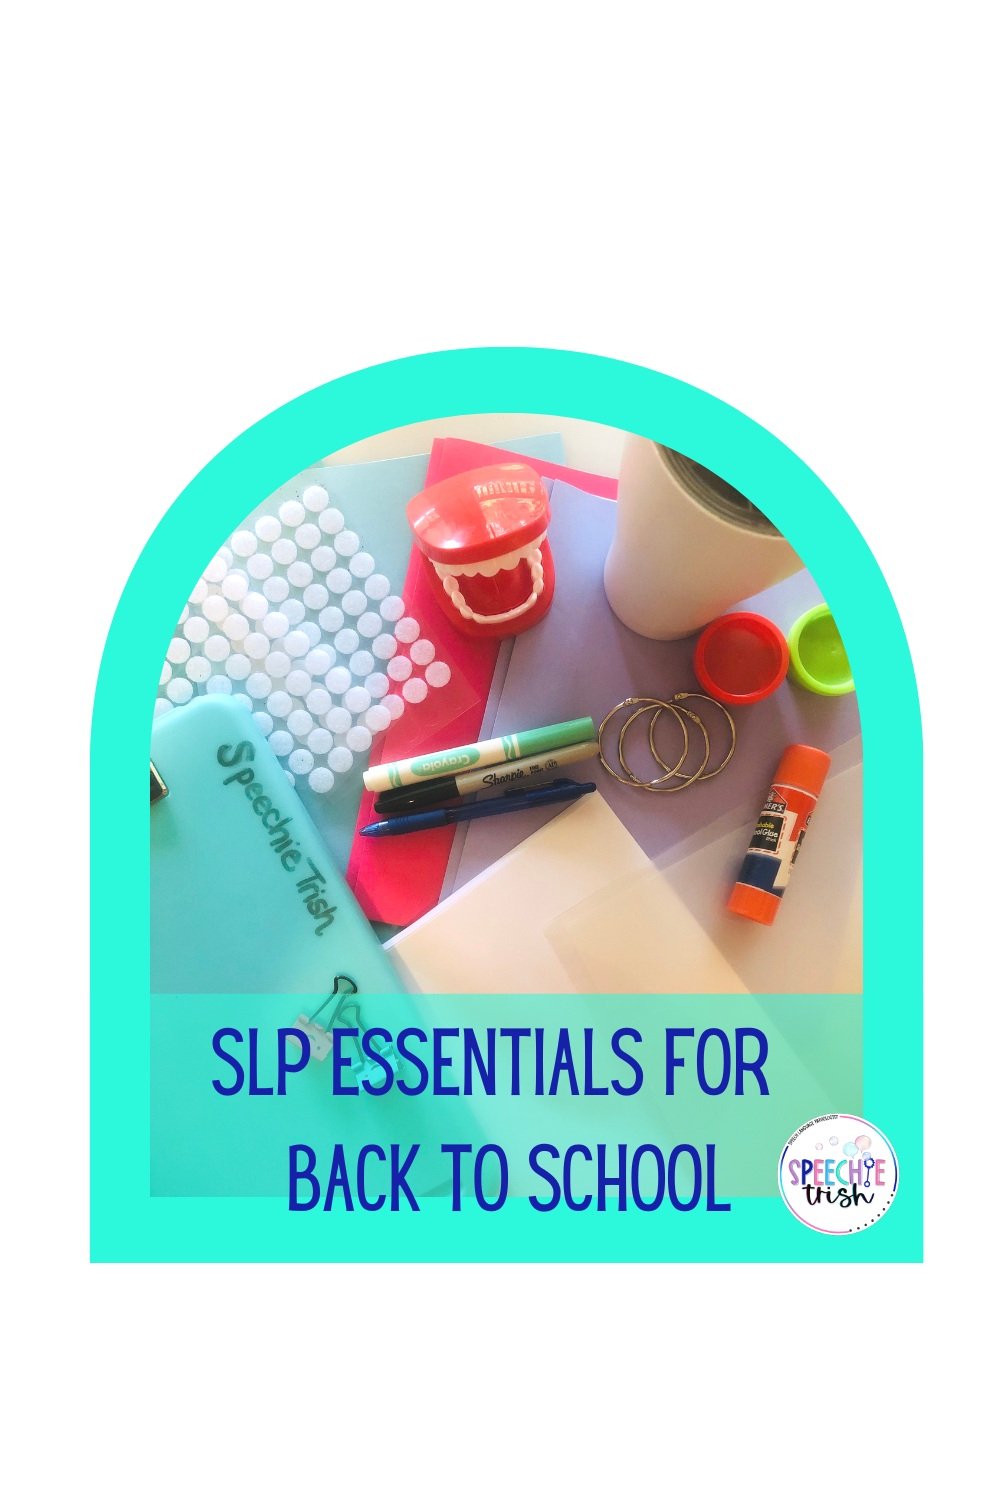
SLP Essentials for Back to School
Essential items for Speech language pathologists to have in their therapy room for back to school.
To make sure we kick speech off with a bang, I've put together a list of essential items that will make our lives a breeze during those first few weeks back in school. Check 'em out:
(Keep in mind that we may receive commissions when you click the Amazon links and make purchases. However, this does not impact our reviews and comparisons.)

Binder Rings with Speech Sound Cue Cards
1. Binder Rings: I use these ALL the time! I have my speech sound cue cards on them for on the go access to the visuals. My students love to flip through them to find “their sounds”. I also use them to hang visuals around the classrooms on plastic hooks.
2. Velcro Dots: Using velcro for visual schedules, adapting books and them for behavior charts is key! I no longer have to cut my velcro with these time saving dots!
3. Copy Paper: Let's face it, we can never have enough of this stuff. Gonna be printing out activities, resources and screening record forms like crazy!
4. Laminating Sheets: I laminate SO MUCH! I can keep activities year after year and kids can’t rip the pages! I use 5 mm sheets for even more durability for my visual sentence strips and books (check out my printable Back to School book for preschoolers!)
5. Plastic Sleeves: Slip those printable resources into these sleeves for use with dry erase markers when don’t have the time to laminate!. Plus, they're super easy to wipe clean. Score!
6. Mesh Storage Bags (the big ones): I used these to store my games paired with books in one place! I have a fun S’mores speech activity that includes articulation marshmallows that can all be stored in one bag.
7. New Play-Doh: Opening play-doh for an activity and finding it gray and hard is no fun!! Who doesn’t love the smell of new play doh any way? It's time to restock our Play-Doh stash. Love using play-doh for smash mats!
8. Nice Pens: Treat yourself to some smooth writing action with good quality pens. They make note-taking way less boring!
9. Dry Erase Markers: I always have a stash of these for making on the spot speech sound visuals and they are perfect for writing on whiteboards or laminated materials.

Plastic Container with attached Lid with Sensory Materials
10. Plastic Bins with Attached Lids: Seems like I always need one to make a sensory bin for a new theme, and the bins with the attached lids work the best for me in my therapy bag since they don’t open unless I want them to.
11. Water Bottle: My goal for this year is to drink more water and even though I have SO MANY water bottles, I want to motivate myself, so I’m buying a new one!
12. Dot Painters: These bad boys can be used for all kinds of cool therapy activities, dot articulation comes to mind and can be used with little prep and kids love to use them!.
13. Glue Sticks: Never can find my glue sticks, so this year I am putting one in every pocket of my therapy bag. I like the clear ones to use with the small pieces that I laminate. I stick inside the laminating sheet to hold the pieces in place while they run through the laminator.
14. Clipboard with Storage: This was a game changer for me last year! I keep each child’s daily sign in sheets inside the storage portion and the child’s sheet that I am working with on top plus my monthly time sheet.
Now that we're armed with these essential speechie necessities, we're all set for an amazing start to the school year.
Here's to a fantastic school year ahead!